The grass is always greener…

I prefer the editor role, sitting behind a computer and proofing what Matt writes. But alas, he has forced me to draft a post myself. Which is only fair since the work I’m about to showcase was done by my mother and myself, no involvement from my dad or Matt whatsoever (teaser for an upcoming post – they had bigger fish to fry).

The Issue: The front of our house looked drab, boring, like it was just emerging from the 30″ of snow we got last winter.

The Solution: Plant stuff.

While I love the color green and love seeing green, I fully admit I don’t have anywhere close to a green thumb. I’m lucky if my plants survive 2 weeks. Thus, I enlisted a woman with a true knack for plants, with years of knowledge on landscaping – my mother.

We started our Saturday looking for some true inspiration. Pinterest to the rescue.

Screen Shot 2016-05-18 at 4.11.02 PM.png

First step, measure the front yard area and evaluate what kind of flowers I liked. Good news, I’m easy, I just like it to bloom.
giphy (1)

Second, venture to Home Depot where everyone and their mothers (literally, it was Mother’s Day weekend after all) were stocking up on plants and outdoor doohickies (there were gadgets and gizmos aplenty). After starting with the essentials (10 bags of mulch, 6 bags of top soil, 3 bags of potting mix, pattered gardening gloves, a new hose, weed blocker, 53 pavers … all picked up by hand) we were ready to move onto the real decisions.

We spent a good hour looking over every plant, evaluating their height, size, color, seasonality… if it’s not obvious at this point, Mom and I don’t mess around–we were doing this once and needed precision to ensure our vision was correctly executed. Feeling good about our decisions, we pushed/pulled/cried over our numerous carts.

IMG_3754

Back at the house, we placed the plants in their eventual spots and got to work.

20160507_150651_resized_1

We proceeded to remove all of the old bricks, pulled all of the weeds from the existing flower bed, dug up half of a tree root (hidden gem), shoveled all of the mulch/rocks, laid weed blocking paper, placed new pavers that gave it height and hid some cracks in the concrete, repainted the wall that was peeling… I’ll let the pictures speak for themselves at this point.

20160507_164312_resized_120160507_164323_resized.jpg20160508_090138_resized.jpg20160508_140810_resized

And the big reveal!

Landscape

Hopefully the perennials hold it together and come back for years to come. Shoutout to my mom who spent her Mother’s Day working with me. We did at least pause for a delicious brunch!

IMG_3764.jpg

Editors Note: Brunch iems don’t generally look nearly as delicious in photographs as they were in real life. This was QUITE a brunch spread!

Getting [the patio] Torn Up

This is going to be what we in call in the biz call a bridge post (no one calls it that, I made the name up just now). Last week was a good chance to stretch out my index fingers and start the ol’ blog back up.

You've Got Mail. Send

I’ve got a pretty long post looming, centering around a relatively big project, and this is going to set that up. This post is a classic example of the deflecting excuse I used to make when I was a teen and I’d get sent upstairs to clean my room. Three hours later Mom would open the door to utter destruction, somehow messier than it had been when I started. “It’s gotta get worse before it gets better…. AND IT’S NOT A DOLL IT’S AN ACTION FIGURE!”

As a refresher, this is what our backyard looked like when we purchased the house (and spoiler alert, until this post nothing had changed):

IS1vstyx4qt4yt1000000000

View from the backdoor, it looks way more forest-y and wild than it is…

If you notice on the left (above), there’s some low fencing that sections off our AC unit, and there’s a decent downward slope straight out of the door with brick pavers, limiting what we can actually use our backyard space for. Beyond that we have another section of pavers where we have a small busted up Walmart patio set (that came with the house), and then a small section of wild foliage (untamed weeds/overgrowth).

IStoqhgr0il7yt1000000000

As you can tell, there’s a lot of potential.

We have grand plans to fence the yard in so Pepper can run around, maybe put some sod in, but the problem is that we just don’t have enough room as currently configured to make it all work. Now that the winter months are beyond us, it’s time to tackle the great outdoors.

050f68fc120738608632662bda4b03c6644d19-wm

First thing I had to do was find a patsy to help out. I can only call him that here because he assures me he doesn’t read the blog. But, thankfully he’s reliable, likes to do home repairs, and wasn’t smart enough to say no. Ryan Moss, thank you very much for your sacrifice.

21854_569674366006_7315293_n

Ryan and I beating the beat up on New Years Eve in 2010

The best part of this project was the trip to Home Depot the night before, where I got to purchase a 4lb sledge, and a crowbar. BECAUSE TOOLS!!!! The worst part, pretty easily, was all of the work. Who would have thought…..

First, we took out the fencing around the AC unit and dug out a holly tree that had rooted itself halfway to China. Just by removing the fence, it felt like the yard had doubled in size.

Ryan pulling bricks

Above you can see Ryan pulling up the loose pavers with the crowbar. You’re probably thinking ‘man Matt, that’s a jerk move making your friend do all the work while you took pictures….’ Well, to that I say, that’s Ryan’s problem. I never pretended to be a nice guy. And in fairness, someone had to stack  all those pavers (190 in total).

Brick pile 1

What a cute pile and variety of bricks….

Brick pile 2

Hmm… that seems to be a lot of bricks… maybe Matt did do some work after all…

total brick pile

Look at all ‘dem bricks! I literally have stacks on stacks on stacks on stacks on stacks on stacks on stacks on stacks on stacks on stacks on stacks on stacks on stacks of bricks. We MAY actually save some and make a homemade fire pit in the back with some of these. That’s a ways down the line though… in the meantime, we’ve got free bricks! If you happen to want some and live in the greater DC area, feel free to take as many as you want, you just have to come and get them yourself. I’m not helping.

Cleared area

The aftermath appeared to be a sloppy mud hill next to some randomly placed rocks. However, we dug a little bit deeper (literally AND figuratively) and made an slightly unsettling discovery.

Concrete slab

If it’s a little hard to tell what you’re looking at, it’s the beginning of a giant concrete slab that runs down to the bottom of the slope (the 10′ of pavers sat on this). If we’re going to do work on the backyard, we’re either going to have to work around the concrete slab, or, we’re going to have to really piss off the neighbors.

auto-jackhammer-oh-you're-sleeping-drill-347833

My next post is going to be a pretty big one, and, I may even have a guest post coming up soon. I know I’ve promised you a Lauren-post before, but, she bailed on that. Her fault, not mine. This time around, I think she’ll stick to her promise, and that may actually end up being the next post. Anyway, I leave you with some Willy Wonka:

9e41e55bce3ba07e7461723bf9649461

Hoosier II: The Finishing

Well, it’s been a hot minute since my last blog post. Since then, winter’s come and gone, and, to be frank, not much has happened (a LOT has happened, like, furnishing our entire house…). If we’re keeping it 100, I tend to get pretty tired during the winter, and spend most of those months living off of stored fat. To make a long story short, I woke up a few days ago, pretty refreshed and ready to get going on spring projects.

tumblr_m7zelhPjAk1qebvfho1_500

What beauty sleep…?

To kick things off, I wanted to do a little update on the Hoosier cabinet I wrote about a few posts ago.

Hoosier

Saved you a scroll…. it was in, lets just say… ‘rough’ shape

After putting in some serious thought into color, and by that I mean about 15 minutes of browsing different color palates, I went with a dark grey with a navy blue trim (basically the same trim color). After that, I did some really loose measurements, jotted down some things I thought I might need, and headed over to Home Depot. Like they say, all the best work is done on a whim without much planning or foresight!

If you all remember, the plywood used on the top and back of the upper half of the cabinet were warped / cracked / peeling. They were the first things to go.

Back Wood Rot

Totally not worth saving…

After removing the plywood, I took a step back to appreciate just how far in over my head I was. It turns out the plywood pieces were holding the entire upper-half together, and all of the shelves nailed in directly to the backing for stability. For a solid hour that first afternoon, I was 50/50 on junking the entire upper half entirely because I had no idea how to put it all back together again. However, against staggering odds I managed to luck my way into putting the new plywood in place and getting them securely nailed in. I was back in business!

The next step, for the upper portion, was to scrape down the beige paint that was in various states of chipping and peeling. I’m sure our neighbors were thrilled to see me in the back yard (neighboring townhouses main floors overlook each others back yards) in long sleeves with rubber gloves and a respirator chipping away paint and blasting the Billy Joel Pandora station (over plastic wrap and other various cleanup-related safety precautions). After what seemed like a month of endless scraping, I was ready to add some primer!

Oh man, this story is getting kind of boring, almost like I’m talking about watching paint dry (I was JUST about to get to that too!). Needless to say, after another 3 or so hours of priming the doors and upper half, I got myself like 1/3 of the way there!

All I would have to do now was strip down the lower half, scrape the old paint, prime it, then paint the upper half, lower half, doors, and trim pieces and then lacquer everything. PIECE OF CAKE! I spent that Saturday night, more or less looking and feeling like Charlie Kelly:

AJRfBy0

I don’t think you can ventilate the outdoors guys…

I’ll skip the repeat text of how Sunday went, because, it would read almost exactly like what I wrote above except for the lower-half. HOWEVER, I actually remembered to start taking pictures on Sunday, so, I’ll post those below!

Disassembled Painting

As you can see, the biggest problem with the picture above, is that you’re not supposed to see directly through a cabinet. You can also see the professional setup I rigged up.

Priming Back Board

You know it’s unprofessional when you use other drying pieces of furniture as stands to dry more recently painted pieces of furniture on. But, we did put that plywood drying to good use…

Hoosier Back Pre Paint

At a minimum, this is a 340% improvement over the peeling above, and it’s not even painted yet!

We can’t forget all the various pieces of trim that needed a face-lift. And an Abita. Because reasons.

Trim Painting

So, after what seemed like an eternal weekend, I had myself a painted ‘refurbished’ bar. Now all I needed to do was add an infinite number of coats of lacquer. If there’s one thing I do know is that, if I have a bar, filled with glasses and bottles and liquids, I WILL spill and scratch and dent it constantly. I consider the lacquer to be my insurance policy.

Front Pre Paint

Laquer Drying

At least I could lacquer from the comfort of the basement with the TV on and a drink and a whole buncha paint vapors.

Anyhoo… I couldn’t be happier with how it all came out! I was able to re-purpose an antique that’s been in the family a while, have a really cool and functional bar in the basement, and proved to myself that I’m not a complete waste when it comes to fixing stuff on my own! Winner winner bigsteakdinner!

Finished Closed

BUS DRIVER….MOVE THAT BUS!!!!!!!!!

Finished Open

I’ll look at doing a post for the backyard sometime next week. In the meantime, I’m going to work on clipping down my hibernation nails and trimming my hibernation beard.

post-53124-Chris-Farley-SNL-gay-beer-ad-g-OzQu

Super Kwik & Super Miscellaneous Post

So, to keep on this breakneck blogging pace I’ve set for myself in the new year, I figured I’d write a hundred words or so today…. Don’t set your expectations too high, this is going to be pretty lame.

First, we had some awesome news this morning, we locked in a 1-month short term rental for our old apartment! We had had one month of overlapping rent/mortgage, and found someone who was looking for a short term lease while they go through closing for THEIR new house. TL/DR: HUUUUGE weight off our shoulders.

What it meant was that today we went to our old apartment and to clear out the remaining goodwill bags we’d left, handover keys, and junk anything else. We figured, while we were there, we might as well check to see if there was any mail that had made it through the USPS mail forwarding system. If you guys know us, you KNOW that on the day we closed (a month before we even moved into the place) Lauren set up mail forwarding with USPS to begin on our move-in day on 12/1. When we got to the apartment this morning, I was expecting a bit of junk mail to slip through the cracks, but my eyes got wide when I opened the mail slot.

Mail Slot

The mailman literally couldn’t fit any more mail into the slot. It even looked like the mailman had tried to cram more in and couldn’t. You would think, at some point as the piles and piles of mail stacked up, that there might be some concern for the inhabitants of Apartment 103. Not to be morbid, but in my first apartment in DC, that was what had actually tipped us off that our elderly neighbor had passed. This seems to have been a total failure in giving a damn by our mailman, which is totally shocking…. *facepalm*. Thankfully, there wasn’t anything important in the pile of junk mail, other than a half dozen Christmas cards, several bank statements (I know I know, I have to go wireless), a new Hamilton calendar, an important notice from my job saying that they’ve been trying to contact me at that address about my 401k, a notice from the Office of Personnel Management telling Lauren that her personal information had been hacked by the Chinese in relation to one of my background checks (free fraud and credit monitoring for 3 years!!!), and my new health insurance card. *faceslam*


Another thing I wanted to note, on a much happier level: I found the perfect opportunity to test out the new TV and sound bar. I happened to be flipping channels a few minutes ago as I noticed that Saving Private Ryan had just started. I flipped over to it as the Normandy scene was just beginning.

Saving Private Ryan.JPG

I gave Lauren a heads up that we were about to put the TV through its first sea trials, and cranked the volume on the sound bar. As someone who’s not particularly into Saving Private Ryan, even Lauren admitted that the sound was pretty incredible. I am, a happy camper.

We’re at the point in “renovations” that I’m getting ready to start with some reveals, so the posts might take a bit longer to develop as we suffer through a death by a million small projects. Also, Lauren has officially asked my permission to write a guest post, so, that might be coming at you shortly.

Antique Furniture Renovation!

Some of you guys know this already (I also explained it in a previous post), but, for the past few years I’ve had a storage unit in NJ with stuff from my childhood home. One of the pieces in the unit includes a Hoosier Cabinet. Now, apparently a few years in storage haven’t been kind to the paint and antique wood, and when we brought it down to VA it was in rough shape. I’m taking this on as a new project for the house, and we want to turn the unit into our new liquor cabinet in the basement (instead of spending $400 and 7 labor hours on a Wayfair piece). I’ll probably save some details, and maybe do a post or two during the rehab, but, I figured this would be a good starting point.

Hoosier

As you can see from afar, there are some pretty obvious signs that this thing has seen better days.

The plan would be to use the exterior platform for top shelf liquor and decanters, as is already more or less the case.

Top Cabinet.JPG

After scraping and repainting the upper cabinet, we’ll use this for glassware and various other supplies.

Bottom Cabinet

After emptying the lower cabinet of my Hess and Tonka trucks, I’ll scrape it, repaint it, and store liquor bottles in the lower half.

Back Wood Rot

Luckily for me, the parts of the hoosier that are in the worst shape are the easiest to repair. I can take off the totally rotted and warped wood on the back and top of the hoosier and replace it with new wood that will help with stability.

Top Wood Rot

Samesies for the top You can more or less tell, it’s only about 1/4″ wood on the top and back, so I’m pretty comfortable taking this on myself. I’ll probably also replace the hinges, and add magnets to the doors so there isn’t as much of a struggle to get the upper cabinets open (smashing glasses anyone?).

Right now, we’re trying to decide on a color to repaint it, and we’ll definitely stay with something period appropriate for both the main color and trim. It’s going to be a bit of a pain to do this, and it’ll take a while to get it done the right way, but I think it could look really cool and work really great with the space in the basement once we’re all said and done.

Wayfair Furniture Assembly

Well, it’s been, literally, just under a month since the last post, and I’m facing the fact that I’m failing this blog. However, I’ll trudge on for a few posts, and pretend like that’s not a thing that’s been happening. So I’d appreciate it if you went along with me on this.

As promised in the last post, I’m dedicating a few words to the website that sold us most of our new furniture. Thank God, when we moved, we brought a significant amount of stuff with us, but, moving from 750 square feet to ~1850 square feet means that there just wouldn’t be a full house. While we had and still have a decent amount of Ikea furniture, we thought that it was time for an upgrade for our new stuff, but couldn’t afford to buy everything new at some of the larger, more expensive retail stores.

Let me back up a step. Prior to and during our house hunting, as I’m sure many of you already knew or could have guessed, we watched a lot of HGTV (Property Brothers, Flip or Flop, House Hunters to name a few). Anyone who’s watched HGTV knows the basic story arc of any of their shows, and there’s a certain amount of corniness to any episode. However, we took a lot of mental notes, styles we liked, features we enjoyed, furniture we thought looked nice. It probably only would have taken any one episode to notice HGTV’s INFATUATION for Wayfair. Any basic storyline, for staging at least, goes:

Step 1- Ew, all this stuff if horrid and dated and just won’t work.

Step 2- WAYFAIR DELIVERY OMG OMG IT LOOKS SO AWESOME!!!

Step 3- Fin

Probably the biggest offender is the show Fixer Upper. When the episode moves into crunch time (I DON’T KNOW IF WE’LL FINISH IN TIME AAAHHHH!!!), a magical delivery truck shows up and an fireman’s line of volunteers carry boxes of fully assembled furniture off the truck like ants at a picnic. Well, that’s a whole load of BS. What Wayfair really is is furniture for people who want to pay a it more for the same the hassle of putting together Ikea furniture, with a slight bump in quality. The first piece of furniture we put together, our basement desk, took me over 3.5 hours to assemble.

Office

Desk pictured on the left.

Lest you think I may be overly dramatic, I wanted to bring you a series of pictures of me putting together our TV stand in our living room.

Living Room Starting Point

Living Room – Pre-Wayfair… a simpler time.

Oh look! A 90lb box!


Closed Box

Sorry, WordPress is being weird with letting me rotate this picture…

Ok, let’s crack this baby open.

First Open Box

A lot of Styrofoam

After we pull out the styrofoam and the top board, I bet it’s pretty simple after that…

Second Open Box

OMG SO MANY PIECES AND EVEN MORE STYROFOAM………

Unpacked Box

Approximately 7 dozen pieces of particle board wood scattered around the living room. Now to get into assembly…

Step 1

For reference, literally every piece of wood has slats and holes to put various dowels and screw-locks into. every.single.one.

Step 2

After the first few pieces of furniture you get the hang of it, but, the tedium is brutal.

Step 3

After the pre-prep, all the pieces (which are lettered either by a sticker on the face of the finished part of the board, or, with a faded unrecognizable stamp on the unfinished part) snap into place. By snap into place, I mean you pop them into place and figure out how to dislocate your wrist so you can reach in at the terrible angle to lock the screws into place.

Step 4

^above, you see the cardboard backing of the piece, what you don’t see are the 90 tack nails you have to hammer in. But not too hard, because, particle board… Now, this piece only took me like 2.5 hours, so, in all, not as bad as I had been hoping for. Time for the big living room furniture reveal!

Finished Living Room 1

With the entertainment center assembled!

Finished Living Room 3

And now with a matching coffee table!

In all, we have (as best as I can count) 8 pieces of furniture from Wayfair. I’ve probably been a little unfair to the company, since the basement desk left a bad taste in my mouth, but, to its credit, it’s a pretty decent step up in quality from Ikea. However, it was a good lesson that, despite what you see on HGTV, 99% of Wayfair furniture requires total assembly (and you pay out the butt for the stuff that is pre-assembled).

New Back Door

Well, it’s been about a week since my last post, and, we’ve hit a pretty major milestone….

*drum roll*

*more drum roll*

*even more drum roll*

*seriously Matt, we’re all over the bit…just tell us drum roll*

OUR CONTRACTORS ARE FINISHED!

Late last week, the two contractors that have been working on site packed up their gear and went on to greener pastures and less annoying clients. The last job they had to do was to install our new back door and lay the tile that sits in front of it. If you go back to one of the original posts (I know I won’t, because that’s like, a lot of scrolling), you’ll see that we HAD sliding glass doors that were pretty hard to actually secure, with more or less a half set of blinds. Every time we sat in the basement, even with the blinds pulled as far as you could, anyone in the back yard could see straight in. Not secure.

While I don’t love this door quite as much as our front door, it’s a marked improvement. We went with a french-door look, but it’s only a mirage as only one half of the frame opens.

Basement Door

Our new doors pretending to be in NASCAR with all the sponsor stickers they came with.

You can also see, the blinds are built into the door, which adds a lot more privacy. They also just look a lot nicer, and also come with a dead bolt and door lock that actually work. SECURE!

Basement Tile

As you can see, the new tile (you’ve seen it in at least one other post about the basement) looks like wood grain, with the function and price of ceramic. It’s also way way easier to clean (obviously we haven’t yet) than carpet when tracking in mud. Which I do….a lot.

That more or less describes all the work that was done on this, but, I took a few more pictures for perspective.

Basement Corner Close

Almost a real functioning basement! 

Basement Corner

MOAR PERSPECTIVE, BUT IT LOOKS LESS LIVABLE #grout&tile

Office.JPG

Office Space

^This picture, as you can kind of see in some of the pictures above, is our “Office”. We have a rich faux mahogany bookshelf with a leather bound book. What I’m trying to say is that we’re very important.

The reason I’m pointing it out is because I’m foreshadowing a future post about a certain online furniture company anyone who watches HGTV would be familiar with. For now, I’ll just call them, Faywair, and, I hate them. So much. For the hours and hours of my life they stole from me. That desk, pictured above, probably weighs 200lbs, and took me over 3.5 hours to assemble. Were it not for scotch, I would have cried. A lot. But that’s a story for another blog post (milking what remaining content I still have to write about).


My Safe Space

Lauren let me have my own place in the apartment where I have free and total reign over what gets hung. I mean, I get like authority over the basement and basement walls, but, not complete say. Just majority share. However, there is a place where I can hang whatever I want, store whatever I want. And while it may not be much, it’s mine. All mine. For example, it’s where I can hang my cattle crossing road sign that I bought in a garage sale back in 2008 when I moved to DC. If you ever want to see it in the house if you visit, it’s in the basement.

utility room door.JPG

Just a normal looking door in the basement, right?

Hot water heater.JPG

Cool Matt, why are you showing me a picture of your utility closet? I mean, it looks nice and all… let’s take a look to the right of the water heater…

cow sign.JPG

My safe space!

The area next to the cattle sign actually worked as a perfect place to store all my childhood boxes (rubbermaid containers on the bottom, since it is next to a water heater…), and gave me a chance to actually hang some of my more “bachelor” things from the past.

Laundry Room

One of the biggest upgrades from apartment living to this townhouse is the storage space that we’re picking up. Not only do we have like 15x the closet space that we had in our 1BR, but, we have a crawl space under the basement stairs to put unneeded boxes, but our laundry room has ample space for shelves and storage. The only problem with the storage space is that it looks disgusting, and has exposed cinderblocks, making it seem extra creepy.

washer and dryer unfinished.JPG

Basically, it was like a much smaller version of the basement in Home Alone

laundry room unfinished.JPG

Gross.

laundry room unfinished floor.JPG

I mean…like…. totally ew, amirite!?

Our original plan was to drywall over the cinder blocks and totally finish the room. Then we looked at our budget, laughed and laughed and laughed and came up with a new plan. We’d waterproof the cinderblocks and then paint them white, with a coat of grey “outdoor garage” paint on the floor. If we couldn’t actually finish the room, we’d damn well make it looked slightly more finished.

Landry room finished corner.JPG

SO MUCH NICER!!!

laundry room floor and wall.JPG

It looks so…. clean!

As you can see, the room looks, from a quick glance, much nicer and less intimidating. Utilizing some furniture we no longer had room for (an old entertainment center, an Ikea shelf, and an armoire) and some Rubbermaid shelves, we basically gave ourselves a place to put extra tiles/paint, bulk dry goods (soo much room for toilet paper), a toolbox (not me…har har guys…), and our holiday decorations. There’s so much room for activities storage. #functionalspace

I’ll post pictures of the moved in Laundry Room once we start posting finished rooms.

We’re Back!!!

Ugh… where do I begin? WWEEELLLLL…. A few weeks ago, I’d promised a post once we were up and running in the new place. It was a honest “goal”, but obviously one that got swept away in the rapids that are moving your life into an active renovation site. This is probably going to be the first of a bunch of smaller posts, to try to break things up for me as writing 3000 words on what’s happened since Nov. 20 doesn’t sound like much fun. Also, at the time this is posted, it’ll already be out of date since I’m writing from Millington, TN while Lauren’s getting a bunch of work done and supervising a bunch of furniture deliveries.

So…. What had happened was…..

We spent 11/20-11/26 in NJ celebrating the baptism of our amazing nephew. Since we were up in NJ for Thanksgiving, we decided to just spend the week there and work remotely, which meant we got to hang out with a lot of my family, which is always nice. However, this isn’t a life blog, this is a home renovation blog, so, we’ll skip out on most of those details. While we were having a blast in NJ, we were trying not to stress about the upcoming move, on top of the bushel of small renovations yet to be completed in the new place. It didn’t go that well for us, as most of our free time we were worrying about everything that still had to happen.

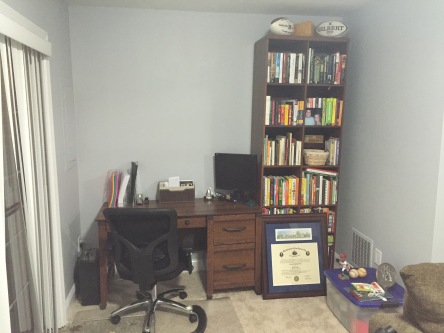
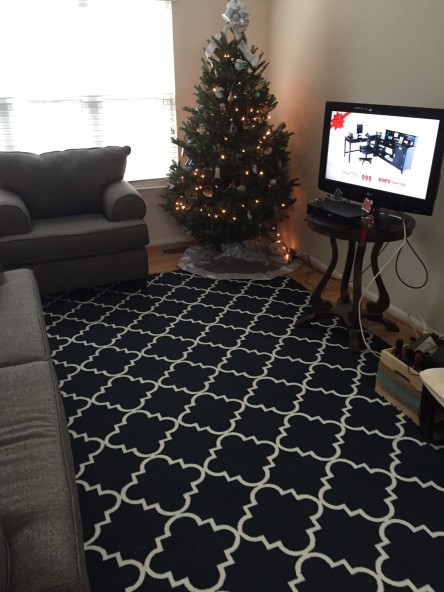
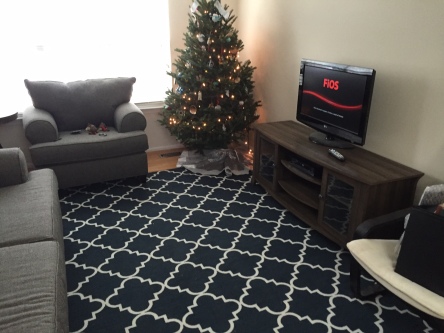
As a short aside, this year marked the first time since Lauren and I have spent Thanksgiving together that we didn’t do any in-store Black Friday shopping (I got a sound bar for the new basement TV online, and she got some stuff from Lowes online). Here’s a picture of it all set-up, with Jumanji in, it’s beautiful!

Basement tv and sound  bar.JPG

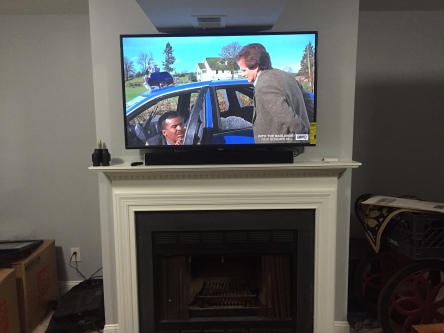
Jumanji coming through crystal clear despite an average camera and the protective coating still on the screen.

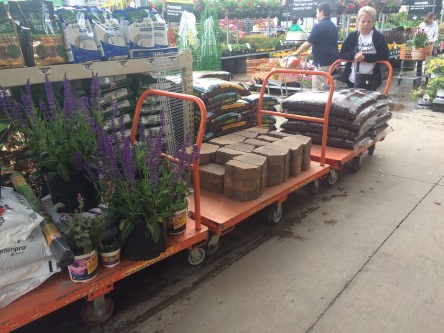
It would have been really refreshing and relaxing if it wasn’t because we were loading up a U-Haul in NJ instead. Some of you may know that my Mom up and sold our house to move to CA (now back on the East Coast) a few years ago. For anyone whose parents still live in their childhood home, get ready, because your childhood ‘stuff’ takes up a lot of room when you eventually have to move it into your house. Since I couldn’t fit an attic worth of stuff in the small apartments I’ve had since living in DC, I’ve had it sitting in storage since she moved. So on Black Friday, we loaded my stuff in the storage unit into a U-Haul, (big thanks to my little brother Mike for the help!) and hit the road for Old Virginia.

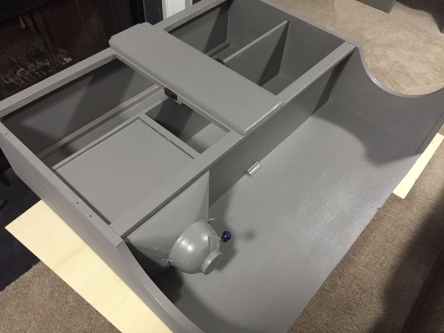
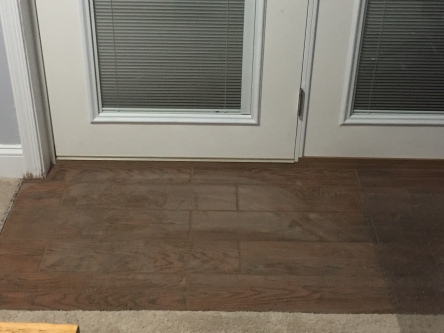
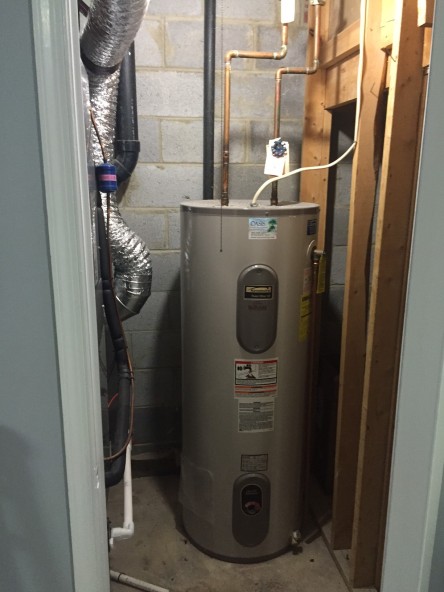
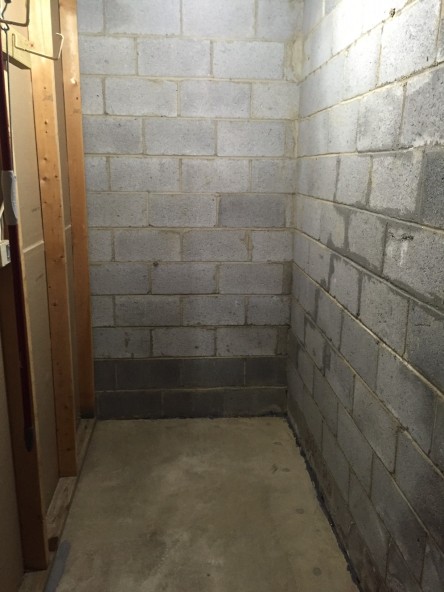
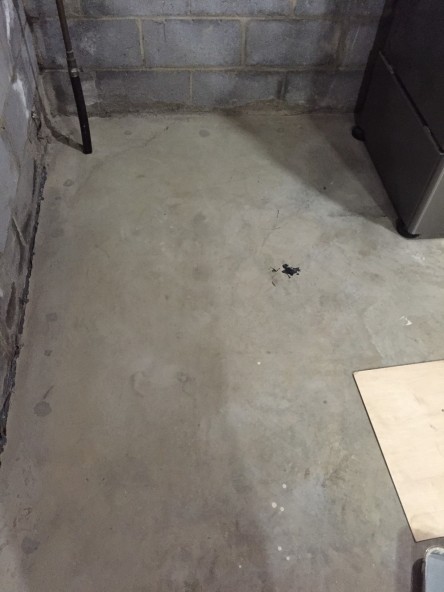
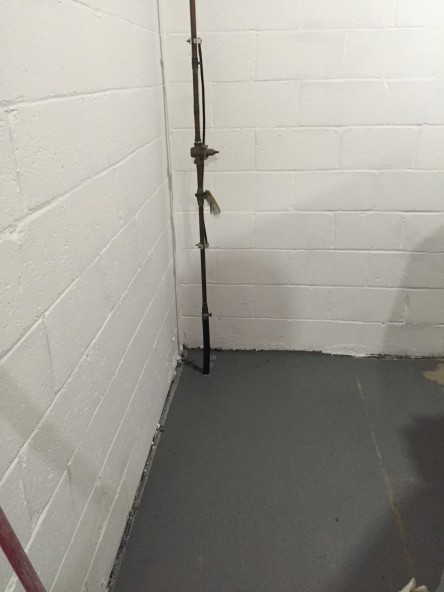
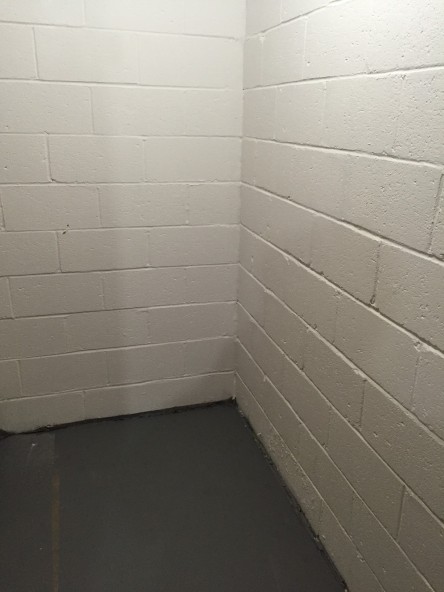
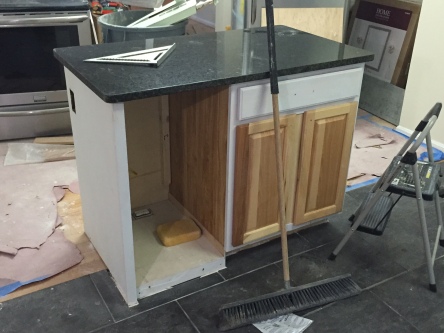
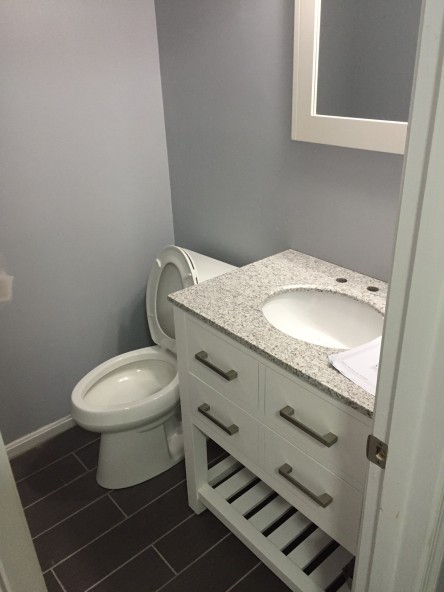
When we finally got down to the new place, we were thrilled to find some progress had been made on renovations, but, unfortunately, not enough to mean that the house would be totally move-in-ready the following day. Here’s a picture of the basement half-bath with tile, vanity and toilet!

Basement Half Bath.JPG

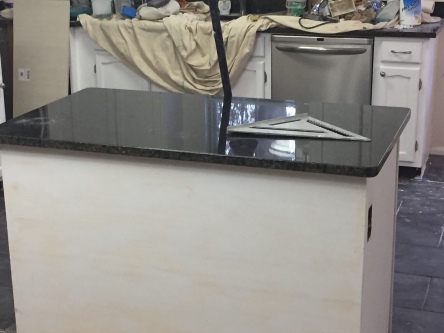
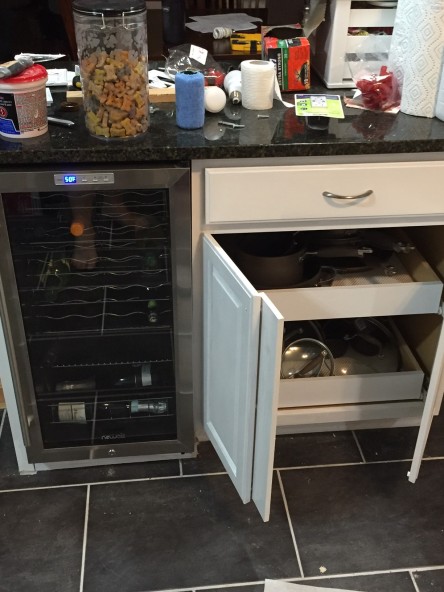
The kitchen also came together really nicely, and was ready for use. The island was finally hooked up to electric, and the wine fridge was fully operational.

island shell back.JPG

From the back, prior to painting

island front shell.JPG

From the front, pre-operational

island finished.JPG

YOU’LL FIND THAT THIS FRIDGE IS …. FULLY OPERATIONAL

On top of that, we still had several hours’ worth of packing to do at the apartment. Black Friday sucked (not as bad as it sucked to be a retail employee or someone in emergency services though, so, consider my privilege checked).

Somehow, we scrambled to get everything relatively packed and organized by the time the movers showed up the following morning. I have to say this, as a big guy who’s accustomed to being the person who gets asked to do a lot of moves for friends, and has always moved himself (with the help of some friends), movers were a game changer. I felt like a lazy sack the whole time, but in a good way. They made what would have been an absolutely tremendously miserable day into a mildly annoying and tiring one. But, lest you stop sympathizing with me, we still had the U-Haul to unload.

Since, like lunatics, we decided on the weekend after Thanksgiving to move, most people we knew were out of town, so we had to rely on my buddy Brendan aka “Samwise” to help. He got this nickname because he bears some physical resemblance to Sean Astin’s character Samewise Gamgee in the Lord of the Rings trilogy.

696f5ac368993420c7cdd89a8f904bfa

Really terrible picture of Samwise, but, appropriately captioned.

brendan.jpg

Like the hobbit he’s nicknamed for, Brendanses are disgusting creatureses. But, he’s what we had, so…. Thanks for the help Brendy! Like any move, the last thing in the truck was the worst to move. We were lucky that a few months ago, my aunt and uncle offered up a California king bed and bed frame. We’ve had it in NJ since we picked it up, and the move was finally our chance to use it. The box spring, which is actually two twin size box springs, went up without a problem, and the frame sat in the basement for painting. It was heartbreaking that we didn’t notice that the stairwell would barely fit a queen size mattress. We were on, literally, the last item to go into the house, and we were zeroed in. The trap was set. We went into the truck, grabbed the handles and hoisted what seemed to be a 400lb mattress. Into the house we labored, finally making it to the stairwell. I eyed up the chute, and to my horror the mattress was nearly a foot taller than the opening, and about half as wide. Had this been any other piece of furniture, any fraction less flexible than a mattress, we would have immediately quit and begun typing up a craigslist ad. However, stupidly undeterred, we bent, and flexed, and muscled the mattress to a point where it could actually wedge into the opening. At this point we were dripping sweat, cursing loudly with forearms burning, and we’d barely gotten the thing a 1/10th of the way up the stairs. Aided by some of the contractors that took pity in us, we fought the mattress for 15 minutes until we were finally clear of the opening and up the stairs. Though the mattress is now comfortably in its frame in the master bedroom, I can’t rightfully say that we beat it. It was, quite easily, the worst piece of furniture I’ve ever had to move. Though, they say nothing in life worth it comes easily, which is true in this case, as it’s the most comfortable bed I’ve ever slept in!

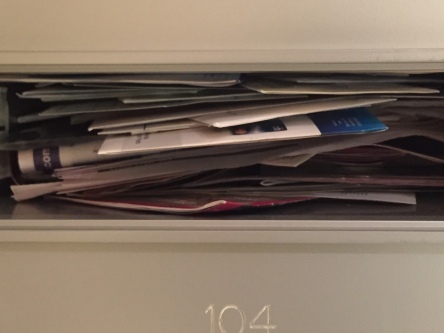
At this point, tired, dejected, and thoroughly over the move, I came back downstairs to the realization that we still had our entire lives boxed up, piled into what could best be described as a rats nest style of organization, with another week’s worth of renovation work ahead of us. I felt like crying. Anyway… I’m already at almost 1,100 words in what was supposed to be a short post, and I’m starting to have anxious flashbacks from that day. I’m going to call it quits and type up a copout post or two.

Basement Mess

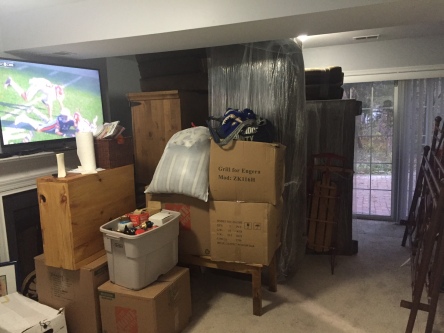
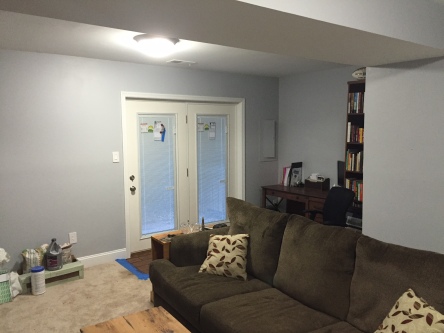
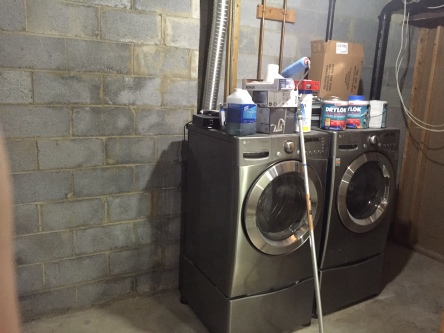
Such a cozy basement!

Livingroom mess

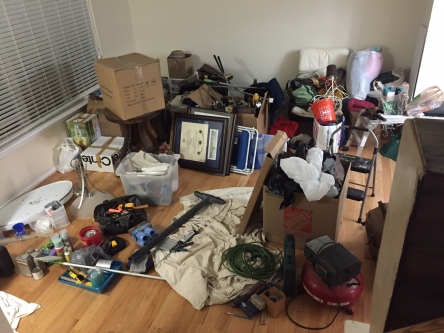
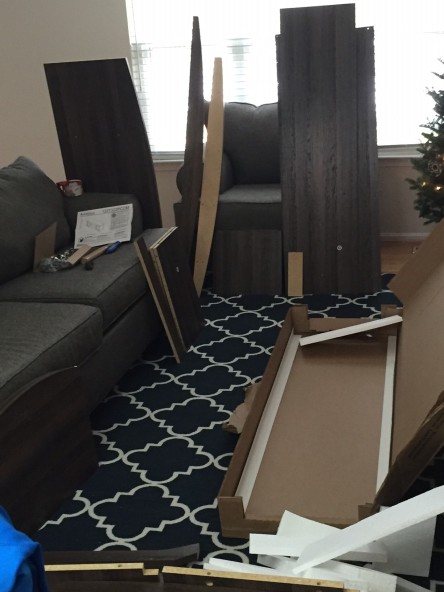
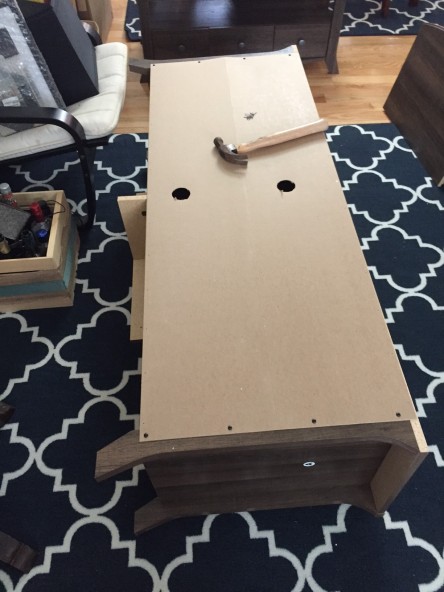
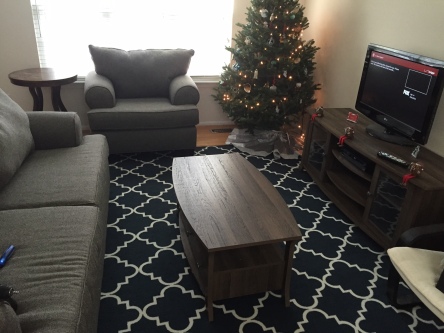
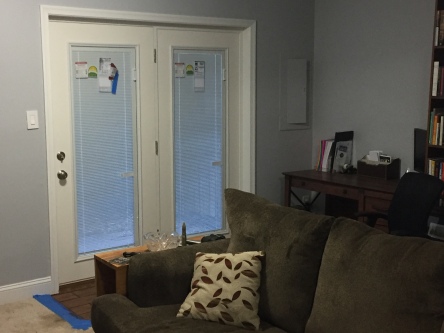
Find a seat in the living room?

master bedroom mess

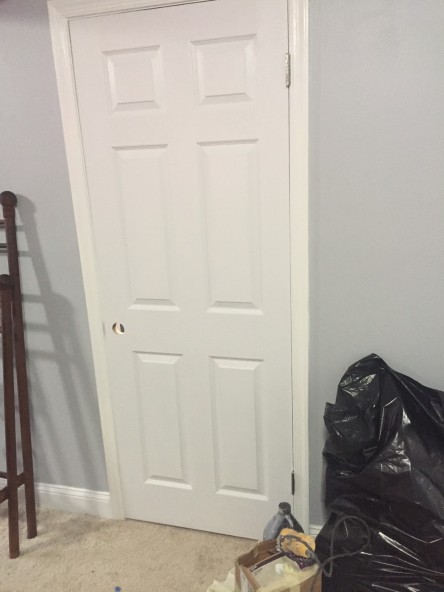
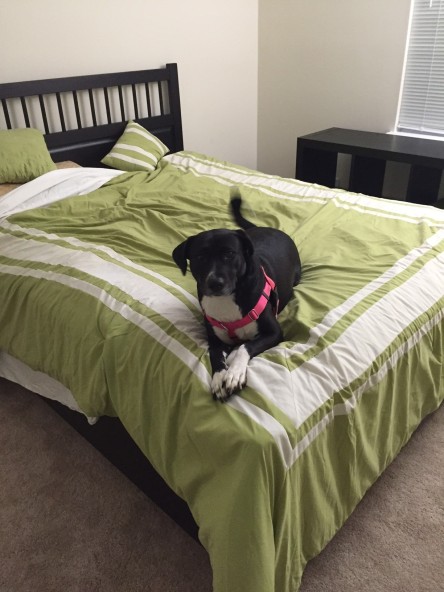
Nowhere to sleep on the big comfy mattress from hell

kitchen mess

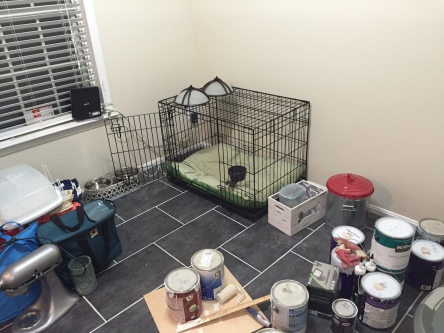
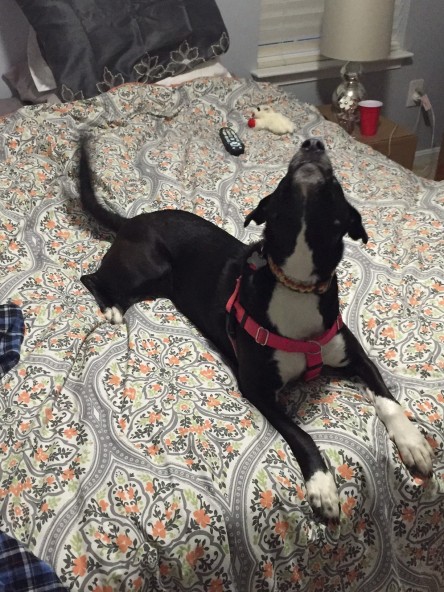
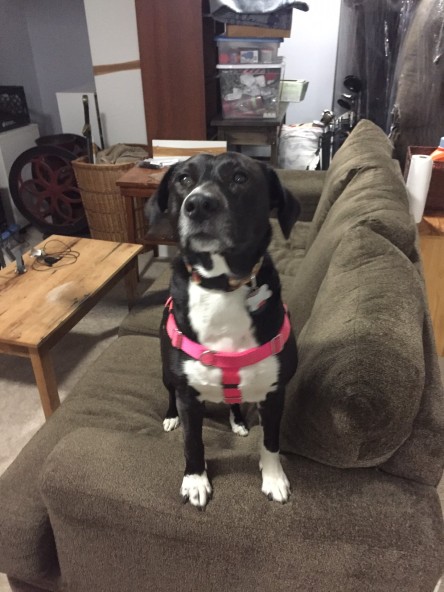
Even Pepper has to suffer through a messy area

wild turkey

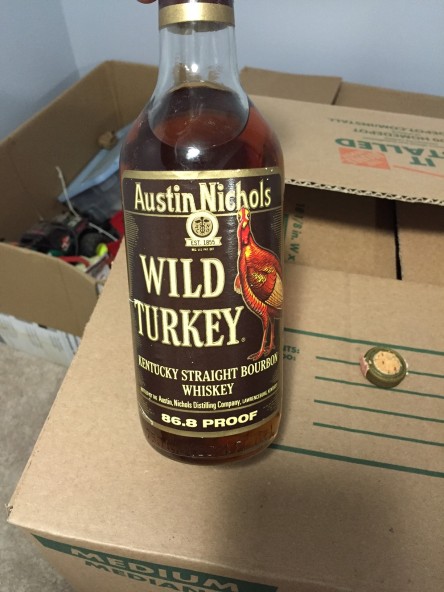
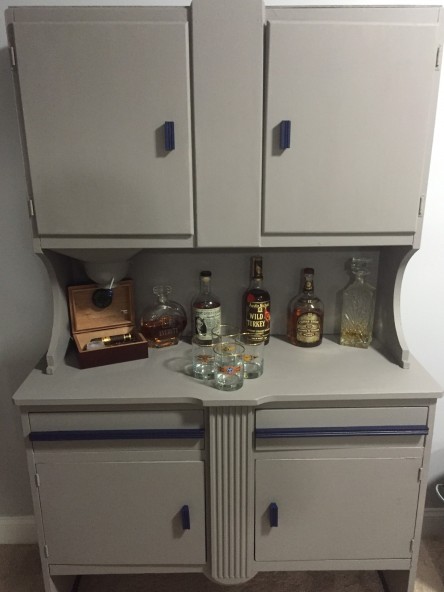
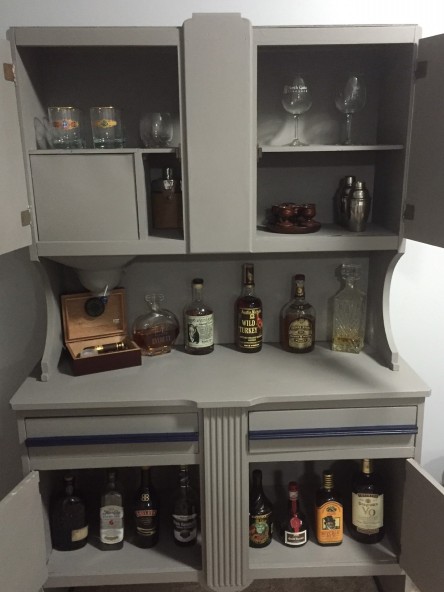
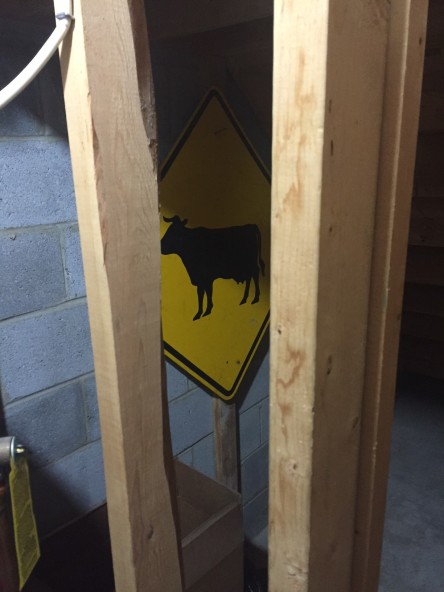
For some reason, a bit of this made everything seem OK…

And, for no apparent reason… Pepper wanted to say HI to everyone…

pepper master bed.JPG

Pepper enjoying the master bed

pepper guest bed.JPG

Always willing to stay the night with any company we have over

pepper basement couch.JPG

Pepper’s never met a couch she didn’t love